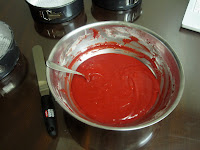
For this weeks desserts, I decided to try to make triple layer red velvet cake with delicious cream cheese frosting. Not one, not even two, but three layers :) Earlier this week while watching "Food Network Challenge" on TV, I saw all the difficult and creative cakes the contestants were making. So, I thought it might be fun if I tried to make a tasty cake that wasn't just one layer, but 3! I found the perfect recipe from food network. It's called "Southern Red Velvet Cake" and the website link is:
http://www.foodnetwork.com/recipes/sara-moulton/southern-red-velvet-cake-recipe/index.html
There's also a video with the recipe that can guide you through the process of making the cake which helped me out a lot. The baker "Cakeman Raven" who was in charge of making the cake also gave me a couple great tips that you might like:
1. Sifting the dry ingredients a couple times helps keep the dry mix much lighter, which helps keep the cake fluffier after being cooked.
2. By wiping oil around the entire inside of the cake pan, then covering those parts with flour, I can prevent the cake from sticking to the pan which makes it much cleaner and easier to remove.
3. By setting the pans in a certain style inside the oven, I can let each layer cook better because they aren't covering each other or blocking the heat.
* All of these tips helped make my baking process go by much smoother and easier, so hopefully they can help you too. *
Originally I thought I was going to have a lot of problems making the cake because it might be uneven, or there might be a lot of crumbs which can mess up the frosting, or one layer might break in the process, but I used Cakeman's tips and everything turned out great! Here are some pictures throughout the process:
Making the layers...
I decided to bake the cake the night before so they would have enough time to cool before I put on the frosting. I then decided to make the frosting the day of so it would be fresher and easier to frost. In total, it took about 4 hours to mix, bake, and prepare everything but it turned out great. When I was dropping off the cake, Chanee told me some great tips of how to wrap the cake so the frosting doesn't get messed up, and from there we ended up having a great conversation. I asked if the residents were liking the desserts or if they had any suggestions, and I was so pleased when she told me that they enjoy my food because it's homemade and prepared just for them. She also told me a little bit about her mom, who also happens to be a baker, and Chanee's favorite kind of red velvet cake that includes with pecans. Before I was hesitant about putting pecans but after seeing how much she likes them, I'm convinced in making another red velvet with them soon.
Tip for the future: Don't be afraid to try something new that can seem intimidating. I was nervous about making this weeks cake because I was scared of it breaking, overcooking, or being uneven and then having nothing to take to PATH that day, but I took my time and it turned out much better than I thought it would. Over coming these challenges is what helps you progress in life, and in my case, grow as a baker.
Thanks to Cakeman Raven and Chanee for the great tips, and thank you for reading.
Sincerely,
The Blissful Baker


Looks amazing! Next time I think you should make some extra cake for your friends and loved ones. I am sure it will be greatly appreciated!
ReplyDeleteKeep up the hard work!
-Cool Cat