Sunday, October 31, 2010

Pink Breast Cancer Awareness Cake!

In honor of October as Breast Cancer Awareness month, for October 23rd I decided to make a pink funfetti cake! All over the radio and TV there are commercials about October as Breast Cancer Awareness month, and everyone has been going pink! I decided to add some pink to my work so further spread awareness. I have a friend whose mom has been affected by breast cancer, so it's really important that people realize how much this disease affects our lives. At least 12% of women born today will go on to have breast cancer. The American Cancer Society estimates that about 40,000 women will die from breast cancer this year. If you haven't donated already, go to http://ww5.komen.org/Donate/Donate.html and you'll see a bunch of ways you can donate and how to have a part in the cure.
What I loved most about the cake is that it connected to what was currently going on and it made people think. To make it I used two boxes of Funfetti cake mix, 3 tubs of frosting , food coloring, sprinkles, eggs, water, and oil to make the cake. I bought an electric mixer to start using from now on and it was so helpful! Overall it took a little over 3 hours to make the cake (an improvement compared to last time!) and it was definitely worth it.

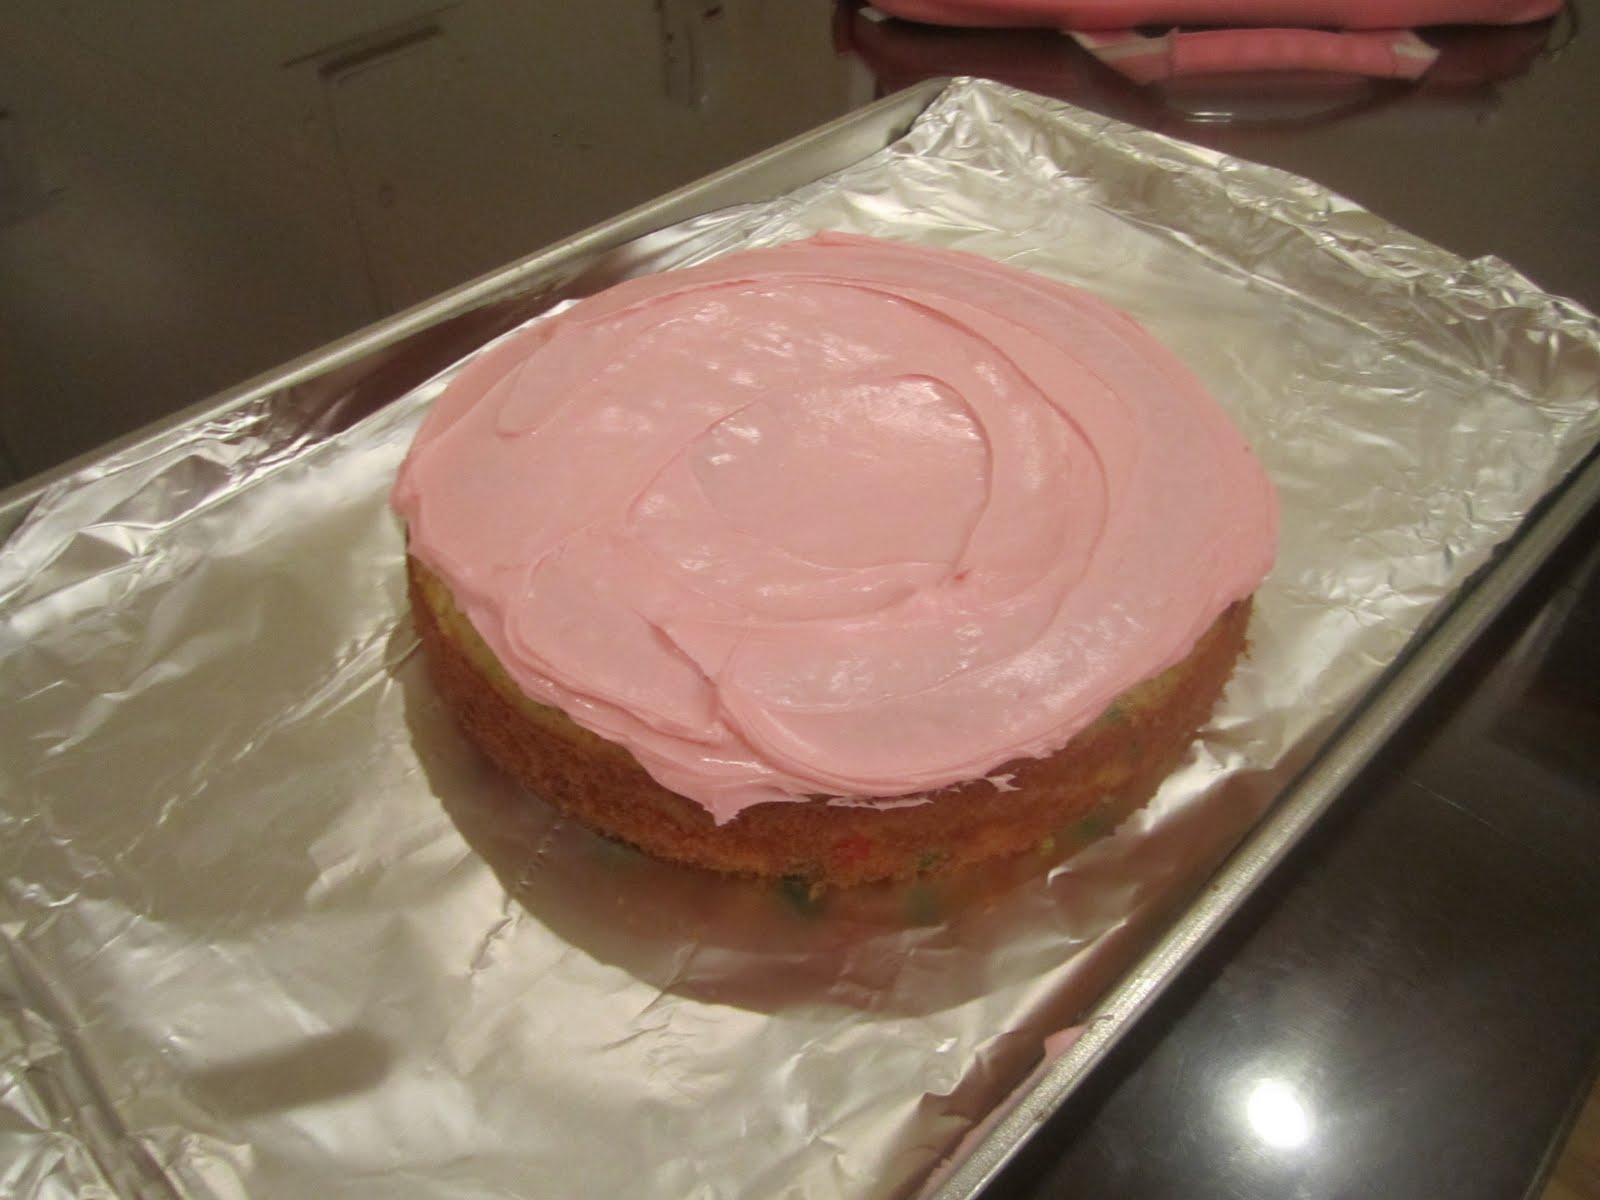
I wanted the cake to be high - 3 layers - and grand so I worked really hard to keep everything in order, for example: make the cake didn't undercook or burn, check that the frosting wasn't too thin or else it wouldn't hold onto the cake, and stop the cake from sticking to the pan at all because that would make a bunch of crumbs. Luckily, I brought the cake out at the perfect time and it didn't stick to the pan that much. The frosting was a little bit thin, but I tried adding some powdered sugar to make it thicker which worked like a charm! Frosting the cake was probably the most difficult part because I really wanted it to look professional and clean. I took my spatula around and around at least 50 times before it was perfectly done. I drew on the breast cancer symbol with some colored frosting I pipped from a bag, and just added some red sprinkles to give it more color. It ultimately turned out great! Here are some pictures for you to see:

All in all I'm really happy with how the cake turned out! This week at PATH when I dropped off the cake, I didn't see Chanee at the desk but instead I met someone new. Her name is Tammy and she second I showed her what I made she told me she was really excited to have the cake and she was going to set it out for everyone in a couple minutes. Her reaction to the cake made me really happy and I instantly wanted to plan something even better for next week -- Halloween!

Anyways, thanks so much for reading and following along! Make sure to read next week about the Halloween goodie bag treats I have planned!

Sincerely,
The Blissful Baker

Saturday, October 16, 2010

Cupcake Fundraiser!

So in addition to baking, I've been putting a lot of energy into some fundraising recently! This entire week I have been studying for tests, doing homework, but most of all -- preparing for my cupcake fundraiser this past Friday! I hosted a fundraiser yesterday, October 15th, at school during lunch and although it seems like it wouldn't take that much work, it really takes SO much energy to put together. I had to: find a good date, run everything by my social action advisor at school, find the cheapest but kosher ingredients (which are a lot harder to find than you'd think!), make posters and flyers then put them around school, print and cut factoids to hand out to people, estimate how many people would buy cupcakes then get supplies according to that numbers, get extra cupcakes pans, buy the actual baking supplies, and get boxes to store the cupcakes which took SO MUCH TIME!!! Then the actual act of mixing, baking, frosting, and designing the cupcakes took 8 HOURS! Thursday was an extremely difficult and tiring day while I was baking the cookies and studying for a test the next day, but everything turned out great :)

I made about:
140 chocolate cupcakes
110 red velvet cupcakes
70 vanilla cupcakes
and 20 cinnamon sugar cupcakes

... for a grand total of 340 cupcakes!

The fundraiser was a little overwhelming because there were so many people buying the cupcakes at once but I'm actually happy it turned out crazy busy rather than have no one there at all haha.

About 50 cupcakes were left over which means I sold about 290 cupcakes total at $1 each. (I gave rest of the 50 cupcakes to PATH) So in total I made...$290 which I'm thrilled about! The cost of all the supplies and ingredients was about $60 so there was a total profit of $230 that I'm donating to PATH. Combined with the profits from my ice cream sandwich fundraiser last year, I've been able to donate about $400 to PATH so I'm really happy about what I've done so far. I know my work isn't close to done so I'm going to keep having fundraisers all throughout the year.

In addition to the super successful cupcake fundraiser that I just hosted with my YOZMA group (a student action group at Milken), I have some other ideas for fundraiser that I'd just like to put out there:

SOVA Drive- everyone in school can bring cans of food to donate and the advisory that brings the most can have a pancake breakfast every Friday for a month. The cans of food would be donated to SOVA
Toy Drive- everyone in school can bring toys to donate and the advisory that brings the most toys can either get some community service hours or a pancake breakfast every Friday for a month.
Toy Fundraiser- try to raise money to buy toys for kids at homeless shelters who don't have toys for this Christmas/Hannukah

So those are just some ideas! I really love how each and every one of them allow me to directly give back to other people whether it's through cans of food or presents for everyone because I can have a more personal connection with the people there. I can't wait until each one of these pull through and actually happen :)

Anyways thanks so much for reading and there are a lot more fun and exciting things coming up soon so stay tuned!

Sincerely,

The Blissful Baker

Tuesday, October 5, 2010

Triple Layer Lemon Cake

Now that I'm back as The Blissful Baker after my month long break, I have a lot of new and exciting ideas for desserts that I hope to make and I'm so excited! After my chocolate spider web cake that I put up last week, I made a triple layer lemon cake and I was so pleased with the results! Recently I've been using 2 boxes of cake mix for each cake I make, so the cakes are becoming much more "grand" and more challenging to make. For the lemon cake I used 2 boxes of lemon cake mix and 1 large tub of vanilla frosting. It wasn't too difficult to make but I really enjoyed designing it and putting it together. Its so fun to be able to shape and color the cake whichever way I please while knowing its still going to taste great :)

Here are some pictures of the cake (and me frosting it!) for you to see:


I saw Chanee again and she saw really pleased to see the cake. I tried some of it from a cupcake I made with leftover batter and it tasted great. I decided to the spider design again because I really loved how it looked, so I tried it doing smaller spider webs all over the top of the cake. I think it turned out pretty well so I'm definitely going to be doing that more often.

Some ideas for future desserts:
- Triple layer funfetti cake with pink frosting in honor of October as breast cancer awareness month
- Spooky halloween brownies
- Thanksgiving Pumpkin Pie
- Cinnamon Buns

Comment this post if you have any suggestions of desserts that you'd like to see me make!

Thanks so much for reading and until next time, stay blissful!

Sincerely,

The Blissful Baker

Monday, October 4, 2010

Chocolate Spider Web Cake

Hello! In the past month I haven't posted up any news that has gone on, but I'm back and I have a lot to share! With college essays, applications, SATs, and school, it's been pretty hard to keep up with my baking, but this week I made my first "spider web" cake and I couldn't be happier with my accomplishment!

Last Tuesday in school I was thinking about what to make for PATH that week, and while I was craving something chocolate-y and I wanted to make something challenging, I thought of the ultimate dessert that's always a crowd pleaser... chocolate cake! I didn't have a lot time to make the cake from scratch because I knew that the assembly would already take a while, so I stopped by Ralphs and picked up 2 boxes of Duncan Hines Chocolate Cake mix, 2 large tubs of chocolate frosting, and one tub of vanilla frosting to make my master piece.
It took about 3 hours, a messy kitchen, and a whole lot of energy, but I ended up making a cake I couldn't be more proud of. Usually when I made layered cakes there had been some problems with crumbs, broken pieces, and balance, but I thought of a couple tricks that could save me from my misery!

First: Instead of using cooking spray (which was a little expensive because I used it so often), I used oil as a new way of coating the pan. But instead of just putting some oil in the pan and letting it sit until I popped it in the oven, I would first coat the pan in oil, make sure it got in all the empty spaces, then stick it in the freezer so the oil really held onto the pan until I put in the batter. I've done that trick the past couple times I've baked layered cakes and it's worked like a charm every time.

Second: Whenever each layer comes out of the oven, I don't know why or how but it always turns out that the center of the cake rises up a bit creating a bit of a "hill" on top of the cake. With multi-layered cakes this is extremely inconvenient because it makes the cake harder to balance and it doesn't stand well. But to solve this problem, I realized that all you need is a heavy bowl, a large piece of saran wrap, and a couple drops of oil. I would put the saran wrap on the top of the cake and lay the heavy bowl on top of that. This way the bowl would act as a weight, pushing down the cake in the middle and making it even with the edges. And to stop the cake from sticking to the saran wrap, I would put some drops of oil under the saran wrap where it would touch the cake. Simple as that!

These tricks were extremely helpful in making the cake look as beautiful as it did. Wanna see? Here are some pictures for your enjoyment :)

The cake turned out really pretty and I was so happy with what I made! I loved the contrast with the white and black on the cake because it really makes the designs on the cake pop out. What I was most happy with this week was how I tried out a new design on my cake and how successful it turned out. For the first time, I attempted at making a spider web style cake (the design is on the top of the cake), and with a lot of care and precision, it turned out great! It was a great accomplishment :)

Thanks so much for reading and stay tuned for more posts coming up!

Sincerely,
The Blissful Baker